 |
|
 |
|
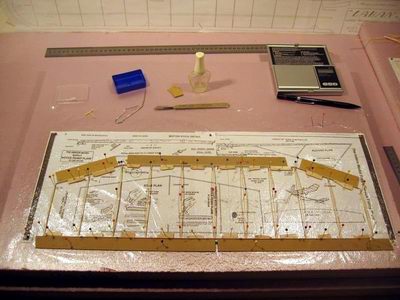
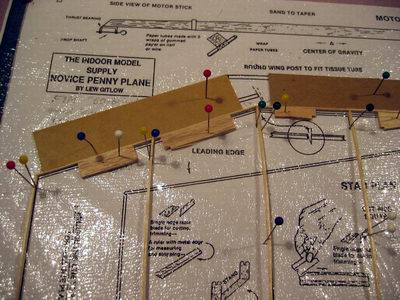
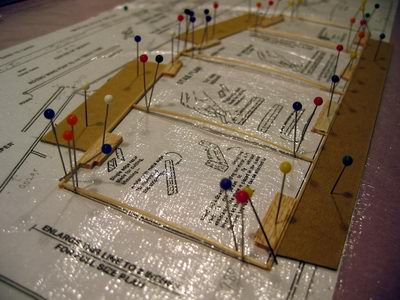
Building the wing. A piece of foam plastic is used as a building board. The parts are held in place by pins, but the pins are never pushed through the parts themselves, as that would unduly weaken them. Instead, balsa and carton pieces are pinned next to the spars to support them. Note the use of long carton pieces as rulers to support the spars and ensure that they stay straight.
|
|
Closeup |
| |
 |
|
 |
|
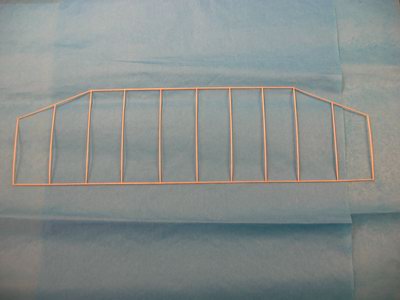
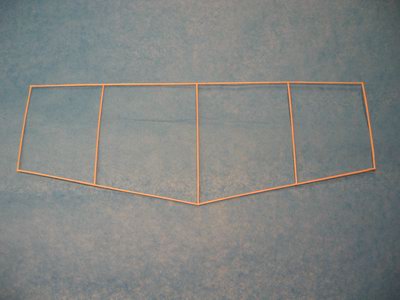
The completed wing frame. Weight: 0.40 grams.
|
|
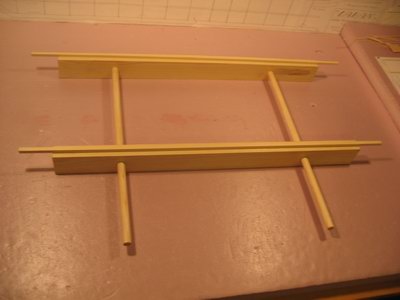
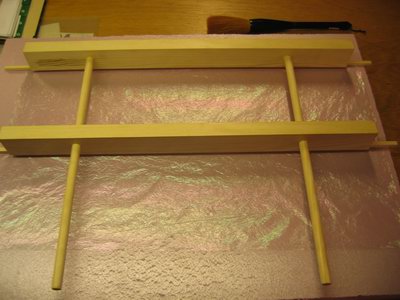
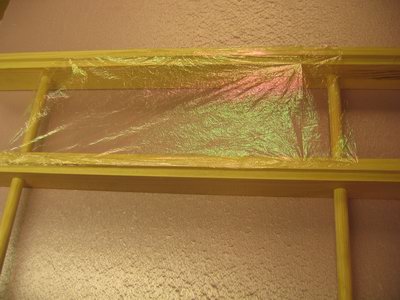
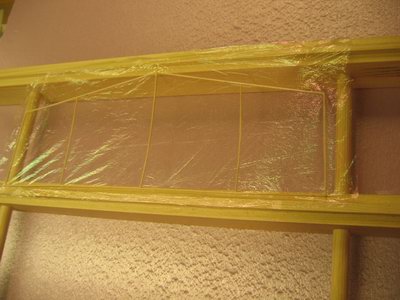
The wing is covered with lightweight mylar. This extremely thin plastic film can be very difficult to handle due to its fragility and static cling. There are a number of different techniques to cover the wing. The simplest is simply to flatten out the film on plane surface and drop the pre-glued wing frame onto the covering. The works well with flat wing, but is more difficult for wings with a curved profile. To make the covering process easier, Torstensson uses this "cradle" made of hardwood, with balsa rails to fix the film onto.
|
| |
 |
|
 |
|
|
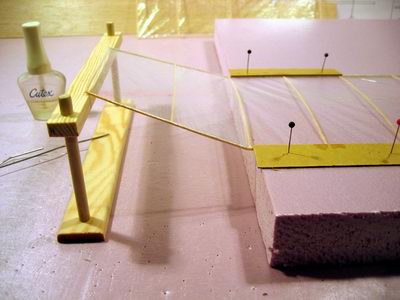
The mylar film is first flattened out on a suitable surface. A very soft brush can make this step easiar and be used to "brush away" wrinkles. Then the cradle rails are covered with glue. The cradle is then placed upside down on the film, as the photo shows.
|
|
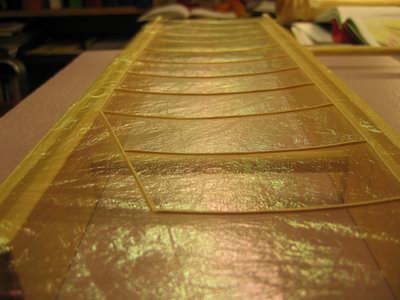
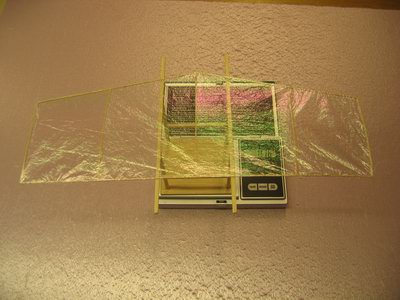
The movable part of the cradle is used to adjust the film so that it will have just the right amount of slack to confer with the wing profile. Here, the wing is used to test the fit to the profile curvature.
|
| |
 |
|
 |
|
When the cradle has been adjusted, it is time to attach the wing frame to the covering. The wing frame is first sprayed with 3M 77 spray-mount glue. It doesn't take much glue, a quick spray from about 3 feet away is sufficient. Note liberal protection of the floor with newspapers, spray glue tends to stick everywhere.
|
|
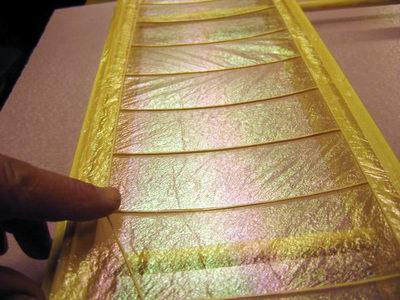
The pre-glued frame is then put on the covering. Lightly press the frame onto the covering with a finger to ensure it gets properly attached everywhere.
|
| |
 |
|
 |
|
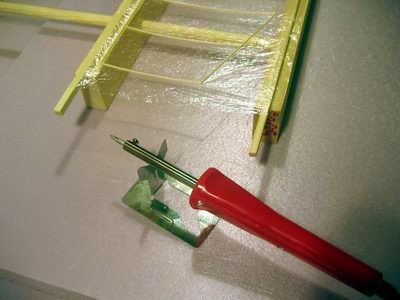
A small soldering iron is used to cut out the wing from the rest of the covering. The iron will melt the film; drag the iron along the wing outline to cut.
|
|
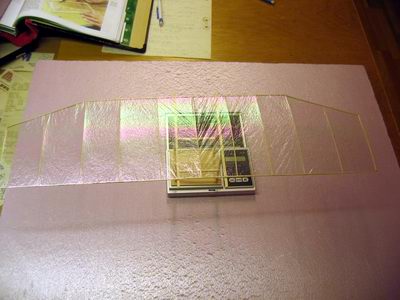
The wing is complete and is weighed. Weight: 0.53 grams.
|
| |
 |
|
 |
|
|
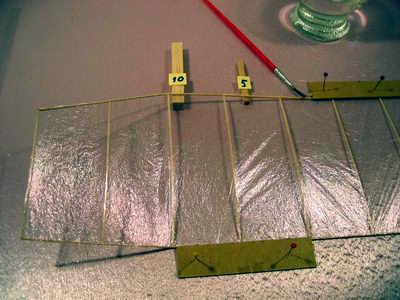
The wing tips should be raised to provide dihedral. Cut halfway through the spars, then gently break them, and put glue into the crack. The tips are set with the help of some kind of support and left to dry. Note how the wing is pinned to the board to ensure that it stays in place.
|
|
The left wing should be washed in. That means that at the wing tip, the leading edge should be higher than the trailing edge.
The left wing tip thus gets a hinger angle of attack, increasing lift and drag and helping to keep the left wing up as the model
turns left.
The leading edge is cracked and glued, the trailing edge pinned down while the leading edge is supported with balsa blocks of correct height, and the wing is again left to dry.
|
| |
 |
|
 |
|
The stabilizer is made in the same way as the wing. First the frame is built on
the building board.
|
|
Completed stabilizer frame; weight 0.11 grams
|
| |
 |
|
 |
| Then the covering is mounted on the cradle, the cradle adjusted, the frame sprayed with glue, and...
|
|
the frame attached to the covering.
|
| |
 |
|
 |
|
The completed frame on the scale for weighing. Weight (as can be gleaned through the covering): 0.16 grams
|
|
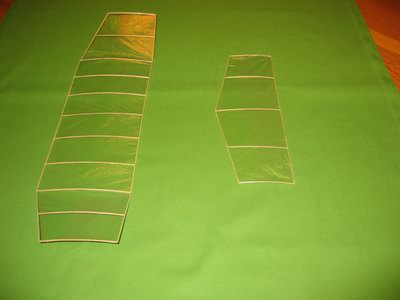
And here is the finished wing and stabilizer.
|
| |
| |